- Click the Website button on the left hand menu.
- Click the Page Content tab.
- From the tabs that pop up underneath, click the Events tab.


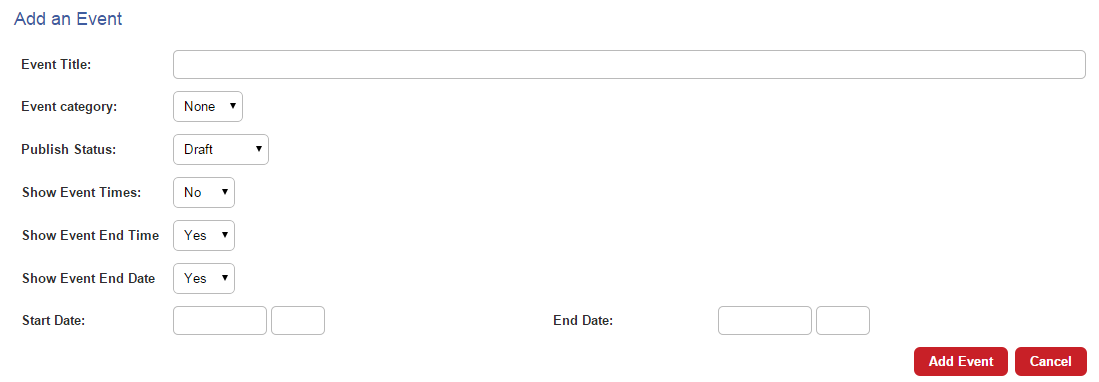
- The Events tab allows you to create Events and their categories. Click the red Add New Event button to get started.

- On the Event edit page, you can input the Event Title, choose a pre-defined Event Category that you have created, choose a Publish Status of Draft or Published, choose whether to Show Event Times, choose whether to Show Event End Time and Show Event End Date and input the Start Date and End Date.
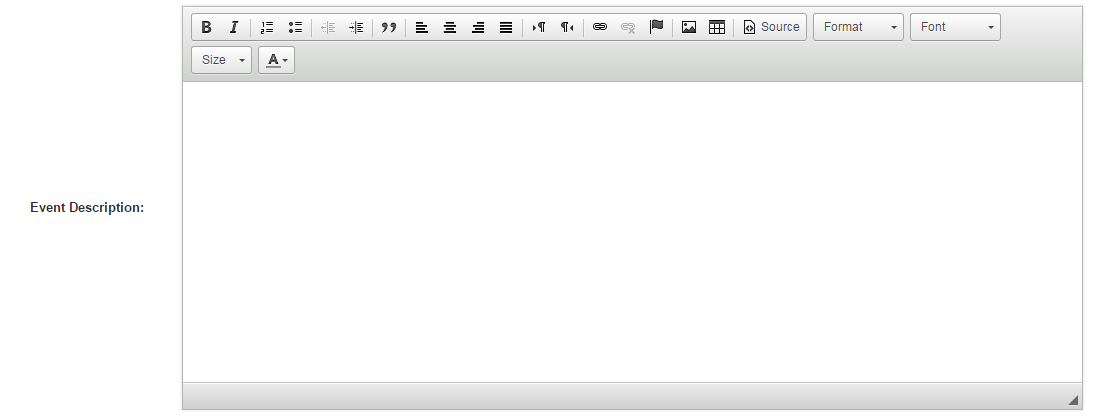
- Enter your Event Description in the edit box.
- The edit box works like a word processor and allows you to input your content, add images and format your text. You can also insert raw HTML by clicking Source.
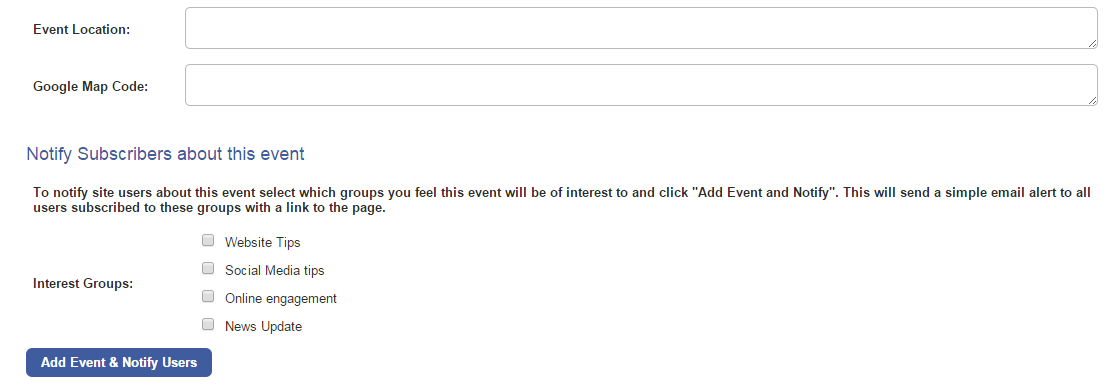
- The Event Location text box underneath is where you write the address or where the event is taking place.
- Google Map Code allows you to enter the code to display a Google Map of the location. Search online for "Google Map Code Generator" and you will find a tool that generates the code for you, based on the information you enter. You can then copy and paste the generated code in to the Google Map Code text box on InTouch.
- Finally, Notify subscribers about this event allows you to select Interest Groups that you would like to receive an email alert, notifying them of the new event, with a link to the page. Once you have selected them, click the blue Create & Notify Users button and the Event will be created on your site and the selected users emailed.
- If you wish to publish the Event without notifying any contacts, simply click the red Add Event button.
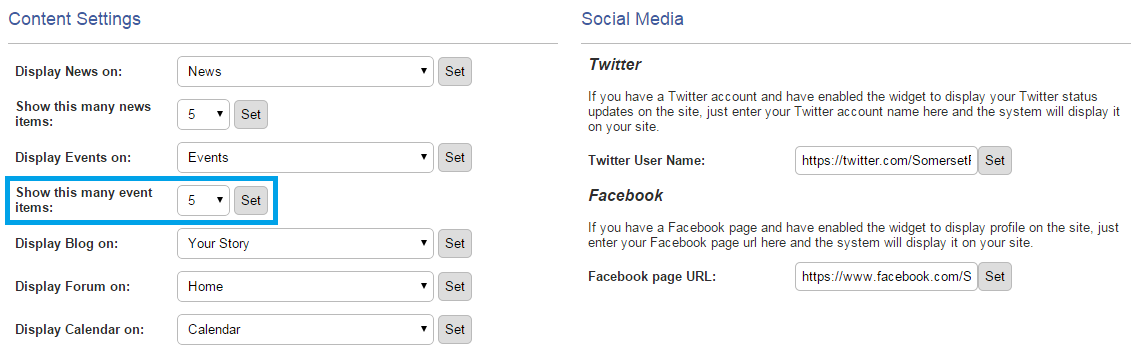
An important note to consider: The amount of Events you can have on your site is set in the Content Settings.
By default it is set to display 5 events. You must increase this number before you create more than 5 events on the system.
To find it, go to Website and scroll down to Content Settings. You can adjust the number of Events you require and then click Set.