How do I create a table on a page of my site?
Last updated by Sam Brown on December 09, 2014 22:18
- On any page, blog post or news item that you are editing, in the HTML editor, click the Table button to bring up a menu.

- The menu looks like this:
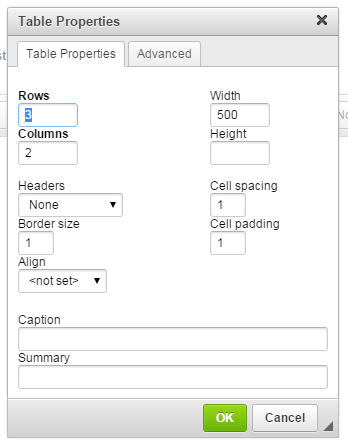
- Input how many Rows you need and how many Columns you need.
- Set the Width and Height of the table, in pixels.
- If you have any Headers select the relevant option (None, First Row, First Column or Both); this highlights the information that you place in to these fields.
- Border will automatically be set to 1 pixels. If you would like to have no border, enter 0 in to the field.
- Cell Spacing is how far apart the individual cells are on the table. 1 is the default and you can go higher, e.g. 6, to space them out more.
- Cell Padding is how much free space is inside the cell around the text. 1 is the default and you can go higher, e.g. 6, to put more free space around the text.
- Align – this option will position the table either in the Centre, Left or Right of the page.
- Caption – If you would like to name your table, enter the information in this field and it will be displayed above the table
- Summary – You can write a summary of the table in here. It will not be displayed on the page but included in the code for search engines to index.
- Click OK to insert the table.
If you need to change the settings of the table at a later time, you can do so by right-clicking on the table and selecting Table Properties from the pop-up menu.
