
The Image Library allows you to upload and manage all of the images and galleries that you use on your website.
- The red Add Image button allows you to upload an image from your computer.

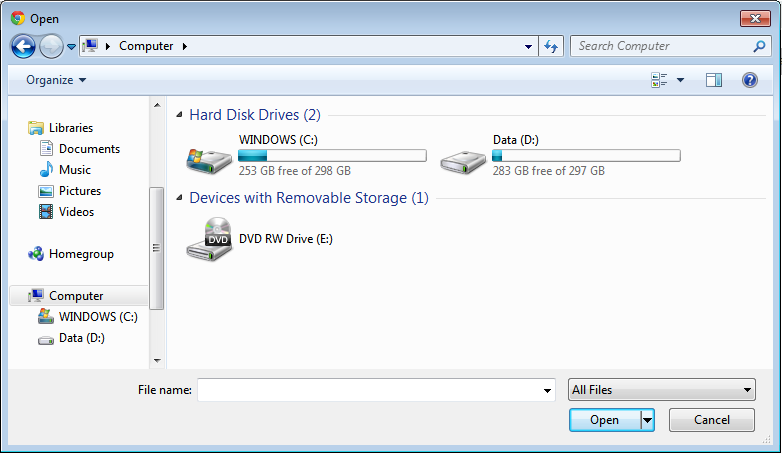
- You will be taken to a screen where you can click Choose Image to locate the image and click Open to upload it.
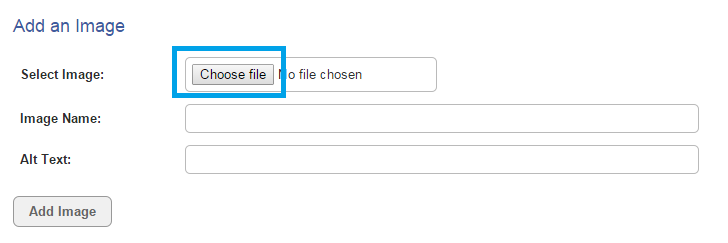
- Image Name is what the image will be called on the site.
- Alt Text is the text that pops up when a user hovers their mouse over the image.
- Click the grey Add Image button to complete the upload and add the image to the Library. It is then ready for use in your pages and content.
- The red View Galleries button allows you to view and edit your existing galleries and add a new one.
- Click the red Add Gallery to create a new gallery, then give it a name and description and click the grey Add Gallery button to complete.
- When you return to the main Image Library, each image has an Add to Gallery option as a blue link underneath the thumbnail.

- The Existing Gallery radio button will be selected, with a drop down menu for you to select the target gallery.
- Click the grey Add Image button to add the image to your chosen gallery.
- Alternatively, you can create a new gallery directly from the main Image Library. Click the blue Add to Gallery link underneath the thumbnail of the first image that you want to add.
- Click the New Gallery radio button, enter a name for the gallery into the text box and click the grey Add Image button.
- Your gallery is created with the image inserted and you can continue adding images to it by selecting it from the drop down menu instead.
Image Library