The 'Site Details' tab allows you to control general settings for your website.
Domain Names
- This section tells you what domain name(s) you have for your website.

Content Settings
- This allows you to choose where you want certain features of the website to be.
- For example, you could set your ‘News’ items to be featured on the News page or the Home page. There is also the option to choose how many 'News' items are displayed on the page. Click Set after making changes to save them and the website will be updated.
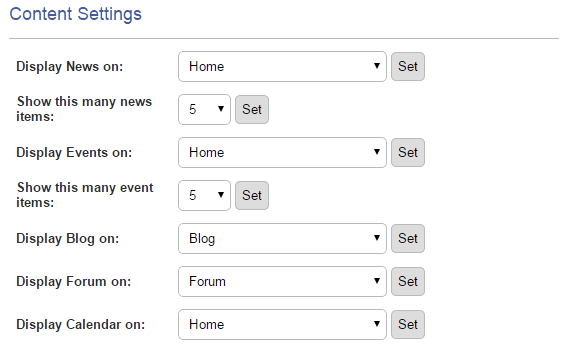
You can create more Events on the system but only this number will be shown on the site, for readability and to preserve the page layout. Showing too many Events at once may cause the site to not function correctly.
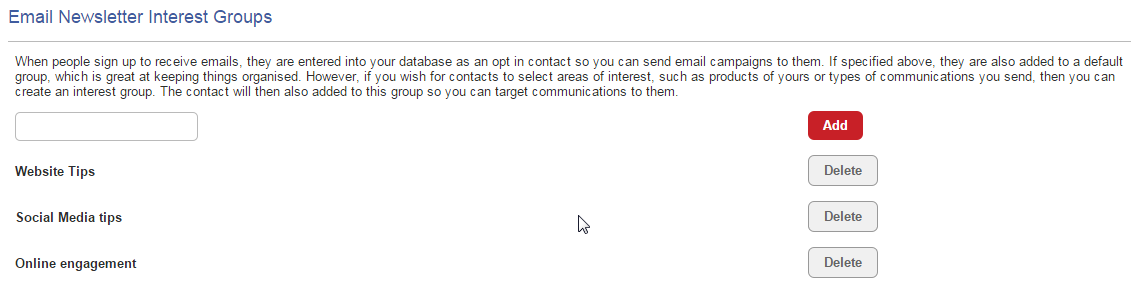
E-Mail Newsletter Interest Groups
- When a customer signs up to receive emails, they are added to the system as a Contact.
- With Interest Groups, you can give them the option to specify what types of content they would be interested in receiving. Simply type the name of the Interest Group you wish to create, click Add and the option is created. The user selects from the options and then they are added to the Interest Group. You can then target these Interest Groups with Email Newsletters that are tailored with relevant information.
- For example, you could have one interest group for Local Events, one for Business News and one for Community News.
- Removing an Interest Group is as simple as clicking the grey Delete button. This will only remove the Interest Group and will not delete any Contacts.
Email Newsletter Settings
- These settings allow you to choose the default settings for a customer who signs up to Email Newsletters.
Lead Source – Here you can choose what Lead Source is created when a customer signs up to Email Newsletters. This appears on their Contact page. It allows you to differentiate your contacts and pinpoint where they connected with you.
Default Group – This allows you to choose which group a Contact is placed in when they sign up for Email Newsletters.
Customise Newsletter sign up Email – When a customer signs up to Email Newsletters, they are sent an automatic email to confirm and to provide them with login details to update their Interest Group and communication preferences. There is a standard template that is sent out, already featuring the website name.
- You can customize this automatic email by clicking the Use a customized message check box. Simply edit the message and then click the red Save/Update newsletter settings button.

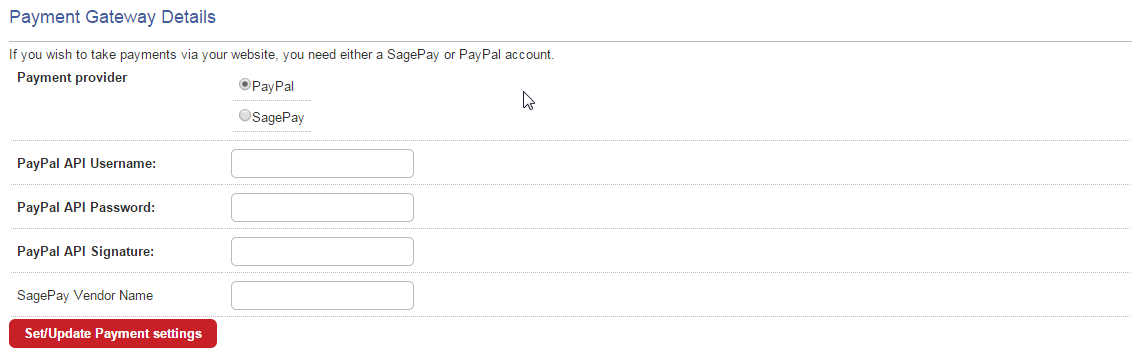
Payment Gateway Details
- You have the option to take customer payment on your website. You will need a SagePay or PayPal account to do so and can input the details to connect your account here.
- Remember to click the red Save/Update payment settings button and you are all done and ready to accept payment.
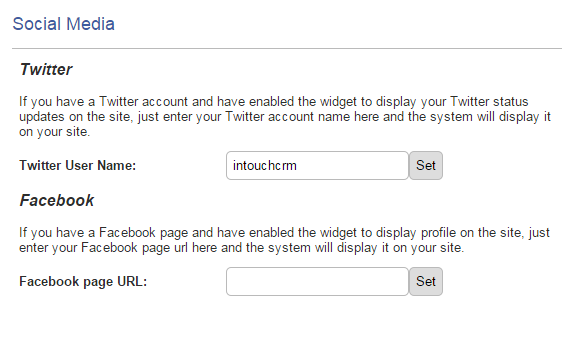
Social Media
- If you have a Twitter or Facebook account and would like to display your updates on your website, enter your details here and the system will display it on your site as a Widget.
- For Twitter, enter your Twitter username with no @ sign and click Set.
- For Facebook, enter the full URL of your Facebook page and click Set.
Site Details